Automation

Content tagged "Automation".

A Raycast Extension to Search My Blog

A screen shot of Raycast running my new extension

I’ve been looking for a way to search through the local copy of my blog using Raycast.

I ended up writing a custom extension to do it. ChatGPT helped grease the way—especially in rendering the results.

It uses a brute force grep over the files’ contents which works fine given the size of the repository.

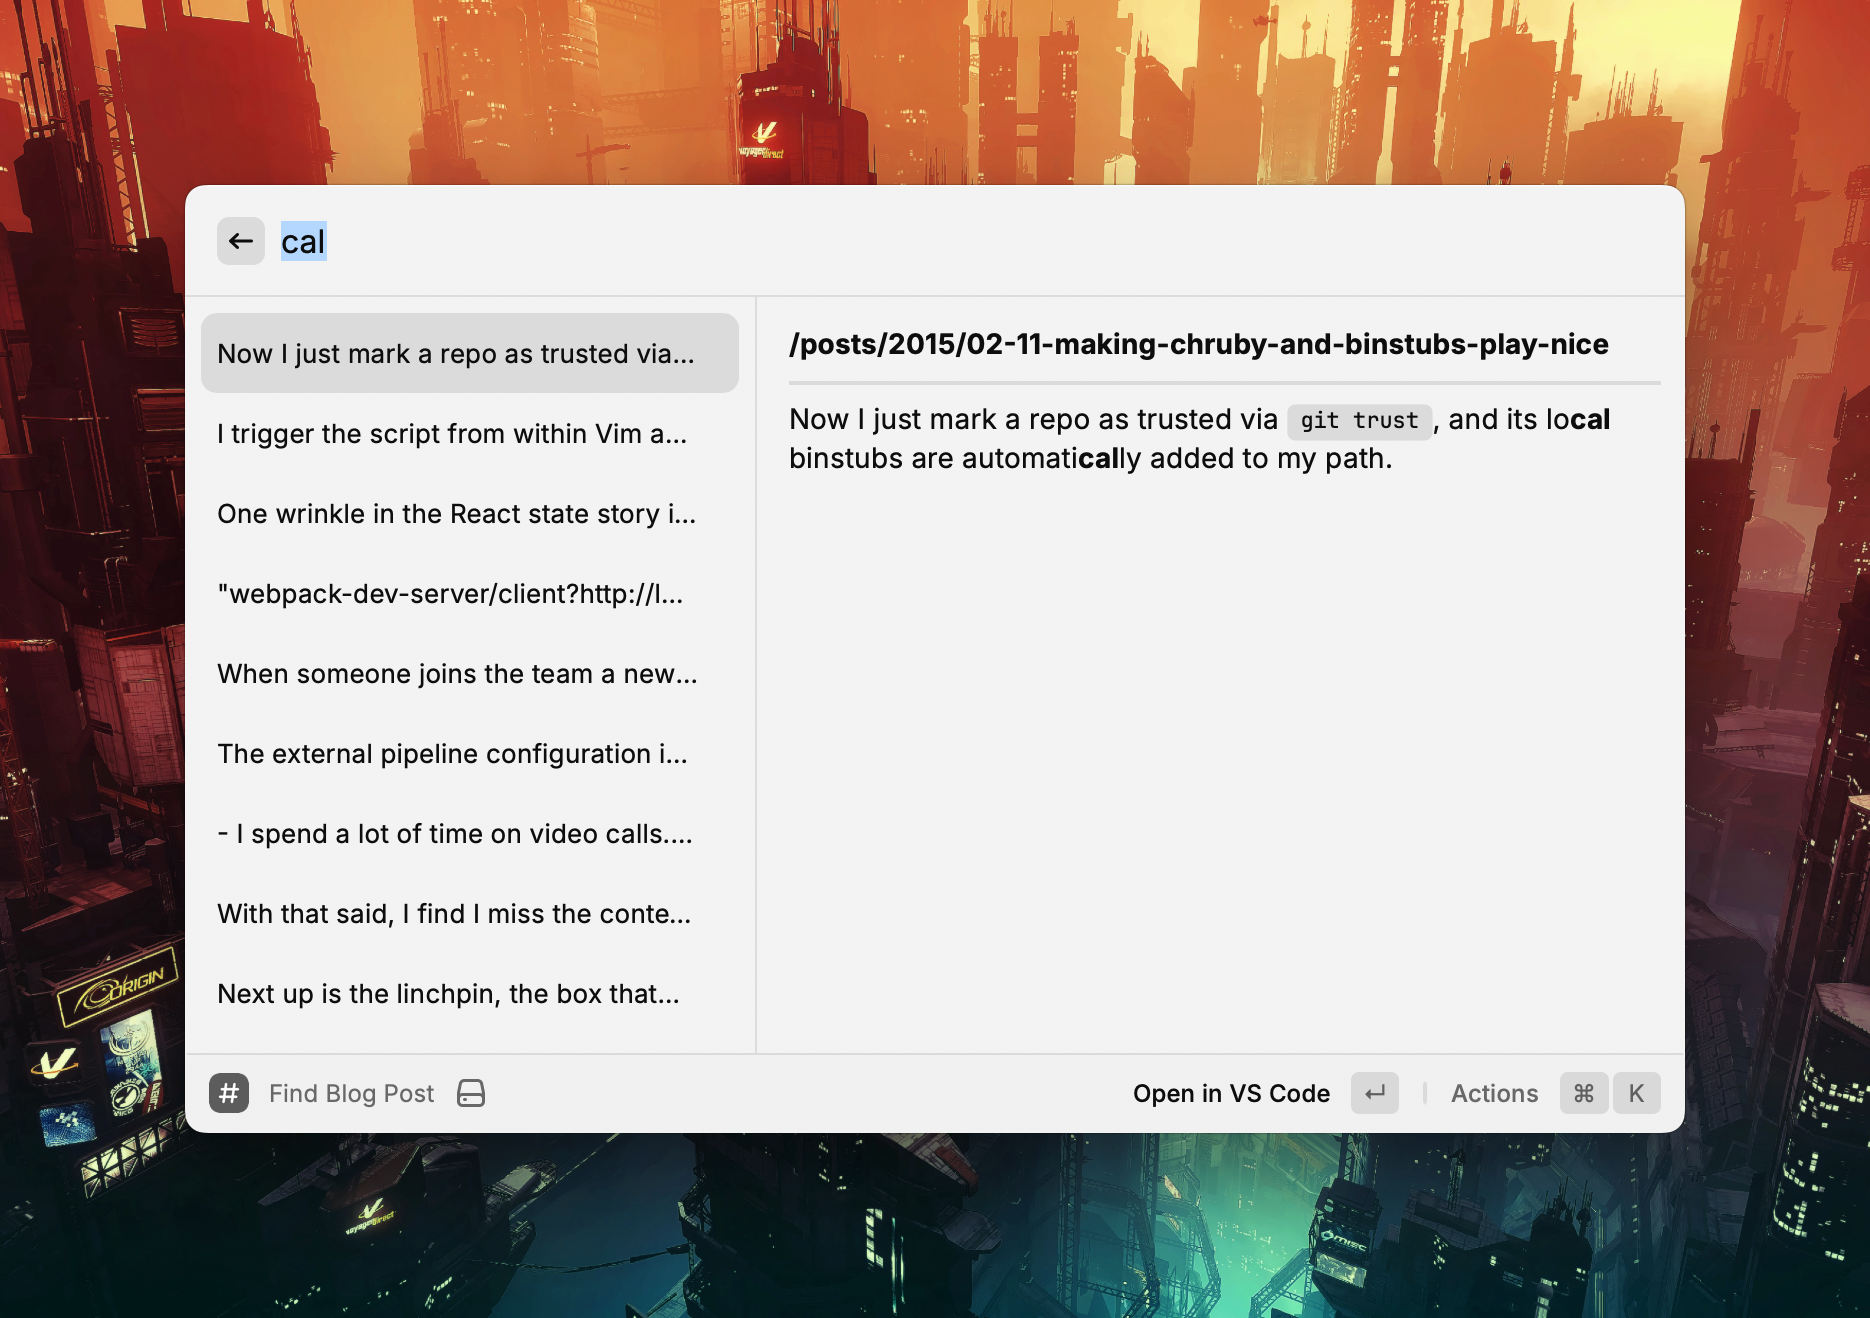
The two main actions on the extension are opening the post in my editor and copying a Markdown link to the post1.

Here is a look at the Raycast command:

export default function Command() {
  const [query, setQuery] = useState<string>("");
  const [results, setResults] = useState<SearchResult[]>([]);

  useEffect(() => {
    if (query.trim() === "") {
      setResults([]);
      return;
    }
    try {
      const posts = getAllPosts(BASE_PATH, BLOG_SUBDIRS);
      const matches = searchPosts(posts, query);
      setResults(matches);
    } catch (err) {
      console.error("Error reading blog posts:", err);
    }
  }, [query]);

  return (
    <List onSearchTextChange={setQuery} throttle isShowingDetail>
      {results.map(({ file, snippet }) => {
        const filename = path.basename(file);
        const relativePath = path.relative(BASE_PATH, file).replace(/\\/g, "/");

        // Convert to URL relative from site root based upon Hugo URL config
        const relativeUrl = `/${relativePath.replace(/\.md$/, "").replace(/\/\d\d\d\d-/, "/")}`;

        // Grab the title from the front matter
        const fileContent = fs.readFileSync(file, "utf8");
        const titleMatch = fileContent.match(/^title:\s*(.*)$/m);
        const title = titleMatch ? titleMatch[1].replace(/^['"]|['"]$/g, "") : filename;
        const markdownLink = `[${title}](${relativeUrl})`;

        return (
          <List.Item
            key={file}
            title={snippet.replace(/\*\*/g, "")}
            detail={<List.Item.Detail markdown={`**${relativeUrl}**\n\n---\n\n${snippet}`} />}
            actions={
              <ActionPanel>
                <Action.Open title="Open in VS Code" target={file} application="/Applications/Visual Studio Code.app" />
                <Action.CopyToClipboard title="Copy Markdown Link" content={markdownLink} />
              </ActionPanel>
            }
          />
        );
      })}
    </List>
  );
}

And here is the full file.


  1. Which is handy when cross linking while writing other posts. ↩︎

Hyper Keys and Mouse Buttons With Karabiner

I’ve got a hankering for keyboard shortcuts.

I’m all about pressing a key without having to worry about which application I’m in and my computer doing something useful.

This noble pursuit has taught me one thing: there’s never enough keys™.

Good old Vim has demonstrated the value of a trusty leader key in the war to get more keys. So, I undertook a holy mission to find the mythical macOS hyper key, and along the way found the deep well of keyboard customisation that is Karabiner-Elements.

Hyper key

I’ve set up Karabiner-Elements so that if I combine the backslash key with other keys, it acts as the hyper key 1.

I use this hyper key as a prefix to bind global shortcuts without having to crush my fingers, and soul, into a ball.

Here’s a selection of the shortcuts I keep behind this hyper key prefix:

  • \+t brings my time tracking app into focus.
  • \+s locks my screen.
  • A bunch of shortcuts move windows around via Moom.
  • A couple of shortcuts switch my audio output between my headphones and speakers via an Alfred workflow.

Mouse buttons

macOS doesn’t natively recognise the extra buttons on my new mouse which sucks because: there’s never enough keys™.

So, I was chuffed to find that Karabiner recognises these extra mouse buttons and can bind them to key sequences.

Here’s a look at my bindings:

My Karabiner-Elements preference

I miss the sideways scrolling of the Magic Mouse, but I’ve set up Karabiner so that if I hold down my scroll wheel button, I can scroll left and right. It works reasonably well and means I don’t need to reach for shift while spinning the scroll wheel to side-scroll.

I map button 4 of my mouse to play and pause my music. The media keys on my keyboard are a chord away, but usually, it’s easier to press a single button instead.

I map button 5 to a shortcut2 assigned to the Meet Mute Chrome extension. This shortcut toggles mute on my current running Google Meet meeting, which is killer.

The config

So there you go. Maybe you’ll find something useful in my Karabiner-Elements config file that you can steal.

And may you never run out of keys.


  1. The hyper key on the Mac is a combination of Ctrl+Command+Option+Shift which is the equivalent of a dragon costume with four people in it, but hey, it does the job. ↩︎

  2. Command+shift+d because the extension doesn’t recognise the hyper key chord for some reason. ↩︎

Playing a Random Album on Spotify

I still like listening to albums and sometimes want Spotify to play a random album from a playlist of albums I’ve created.

I couldn’t find anything out there that does this so I wrote myself a script to handle it instead.

Here’s a rundown if you want to use it.

First up, you’ll need a playlist with at least one track from each of the albums you want to choose from (here’s mine). Grab the ID of your playlist1, and your username and add them into the script below.

Then, you’ll need to create an app in Spotify and get your client ID and secret, add them to the script below, so you can authorise the script.

Finally, run gem install rspotify in your default ruby2 and you should be off to the races.

Run the script with Spotify desktop app installed and it’ll open up a random album for you to press that sweet, sweet play button on ⏯.

I run the script from an Alfred workflow so I’ve got it close at hand.

Enjoy 🎷🎶

#!/usr/bin/env ruby
#/ Usage: open-random-album
#/ Open a random album in Spotify.
#/

require "rspotify"

class RandomAlbum
  CLIENT_ID = "YOUR CLIENT ID"
  CLIENT_SECRET = "YOUR CLIENT SECRET"
  USERNAME = "YOUR USERNAME"
  PLAYLIST_ID = "YOUR PLAYLIST'S ID"

  def self.fetch
    RSpotify.authenticate(CLIENT_ID, CLIENT_SECRET)
    new.fetch
  end

  # Grab the albums from a playlist and choose one at random
  def fetch
    playlist = RSpotify::Playlist.find(USERNAME, PLAYLIST_ID)
    albums_in_playlist(playlist).sample
  end

  private

  def tracks_in_playlist(playlist)
    limit = 100
    offset = 0

    [].tap do |result|
      loop do
        tracks = playlist.tracks(limit: limit, offset: offset)

        break if tracks.empty?

        result.concat(tracks)
        offset += limit
      end
    end
  end

  def albums_in_playlist(playlist)
    tracks = tracks_in_playlist(playlist)
    tracks.reduce({}) do |acc, track|
      acc[track.album.id] = track.album
      acc
    end.values
  end
end

album = RandomAlbum.fetch

puts "Opening '#{album.name}' in Spotify"
system "open #{album.uri}"

  1. Click on Share -> Copy Spotify URI. The playlist’s ID is the string after the last colon. ↩︎

  2. If this becomes a pain I guess you could look into bundling the script up with its required gems somehow. ↩︎

Finding Open Web Pages with Alfred

There are a handful of web pages that I use regularly throughout the day. Some are web apps that I keep pinned in Chrome while others come and go as I work.

I tend to close tabs when I’m done with them but I still end up with many open tabs. I’ve created an Alfred Workflow that opens a page I’m looking for so I don’t have to pick through my Chrome tabs by hand to find it.

The Find Page workflow takes a URL from a predefined list, runs an AppleScript that finds and activates the associated page if it’s already open in Chrome, otherwise it opens it in a new tab.

Find Page Workflow definition
Find Page Workflow example

You can download the workflow and try it yourself.

RSS feed for content about Automation.